Depending on how the event is set up, there are two possible registration paths:
- Open Registration The event is open to everyone, and you can sign up directly on Sched.
- Invite-Only Registration The event planner will manually add you to the event. You’ll receive a Welcome Email from Sched with a link to set up your password and access the schedule.
Note: Please contact the planner of the event or Sched Support if you are unsure on which approach to take.
Register via Sched (Open Registration)
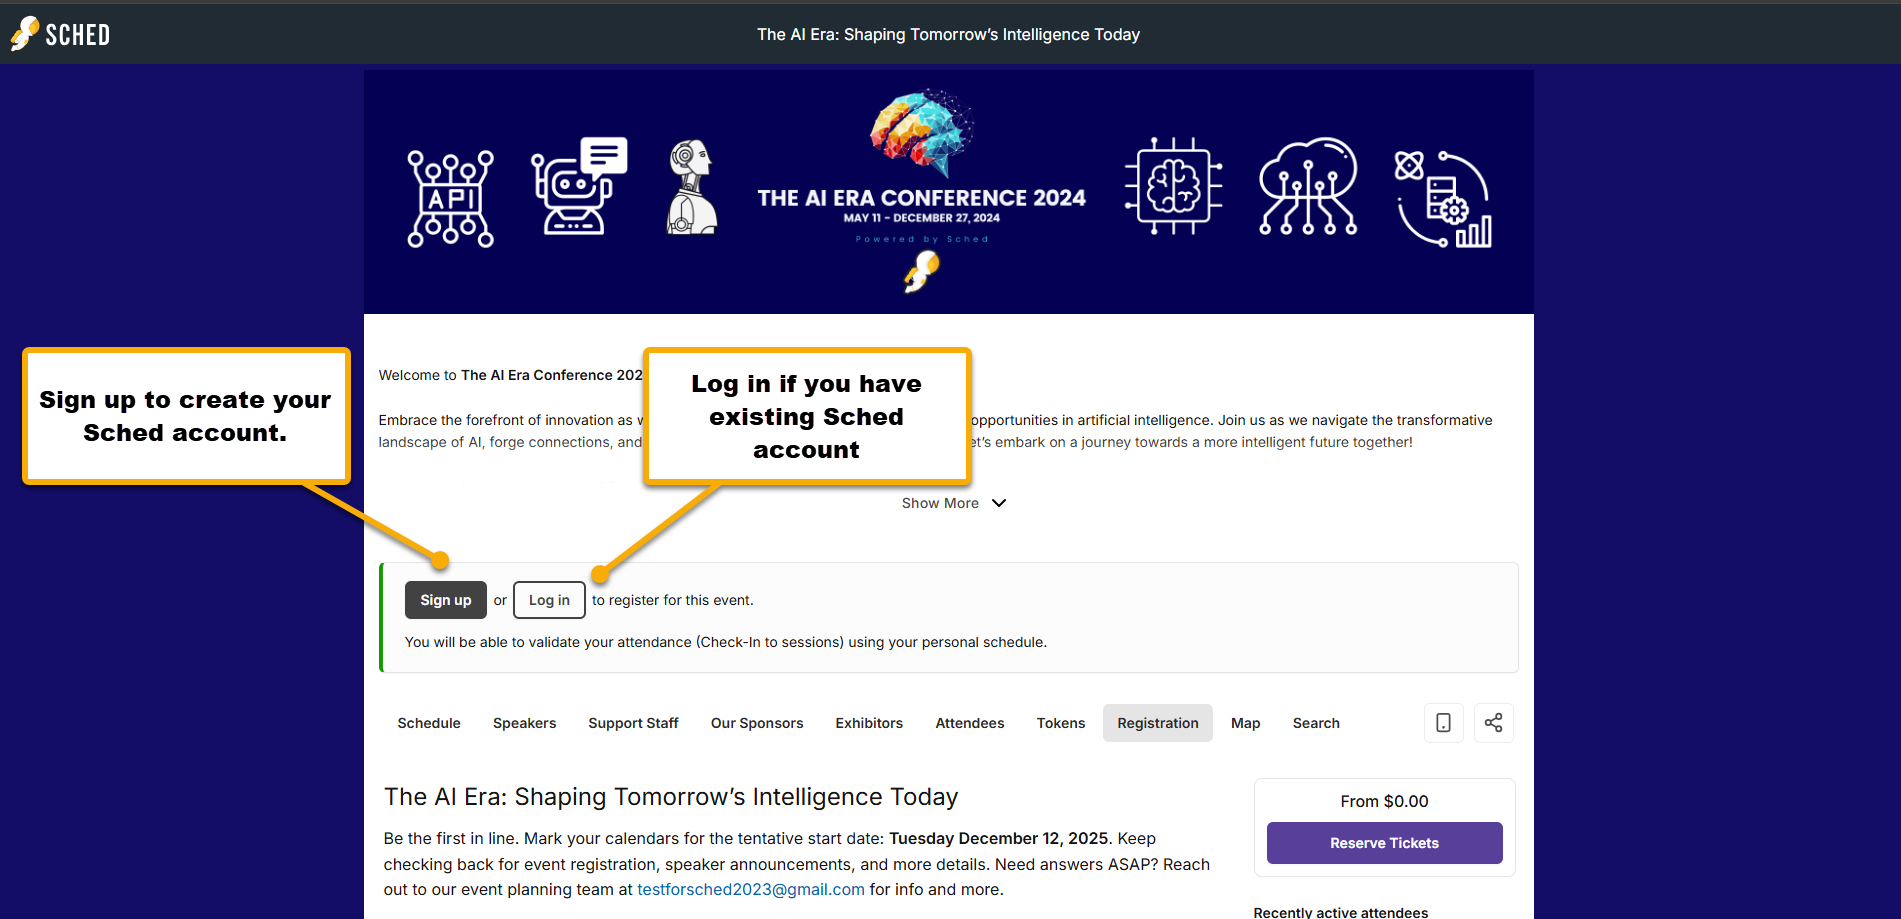
If the event has open registration, you can sign up and join right away through Sched, no password or invite needed. If the event is protected by a password wall, you’ll need to enter it first to unlock the page.
Don’t have the password? You can contact the event planner directly or email us at support@sched.com with the event link, and we’ll help point you in the right direction.
Once the event is unlocked, you’ll be able to log in or sign up to join.
How it works:
-
Create your Sched profile or Sign in to your existing account.
-
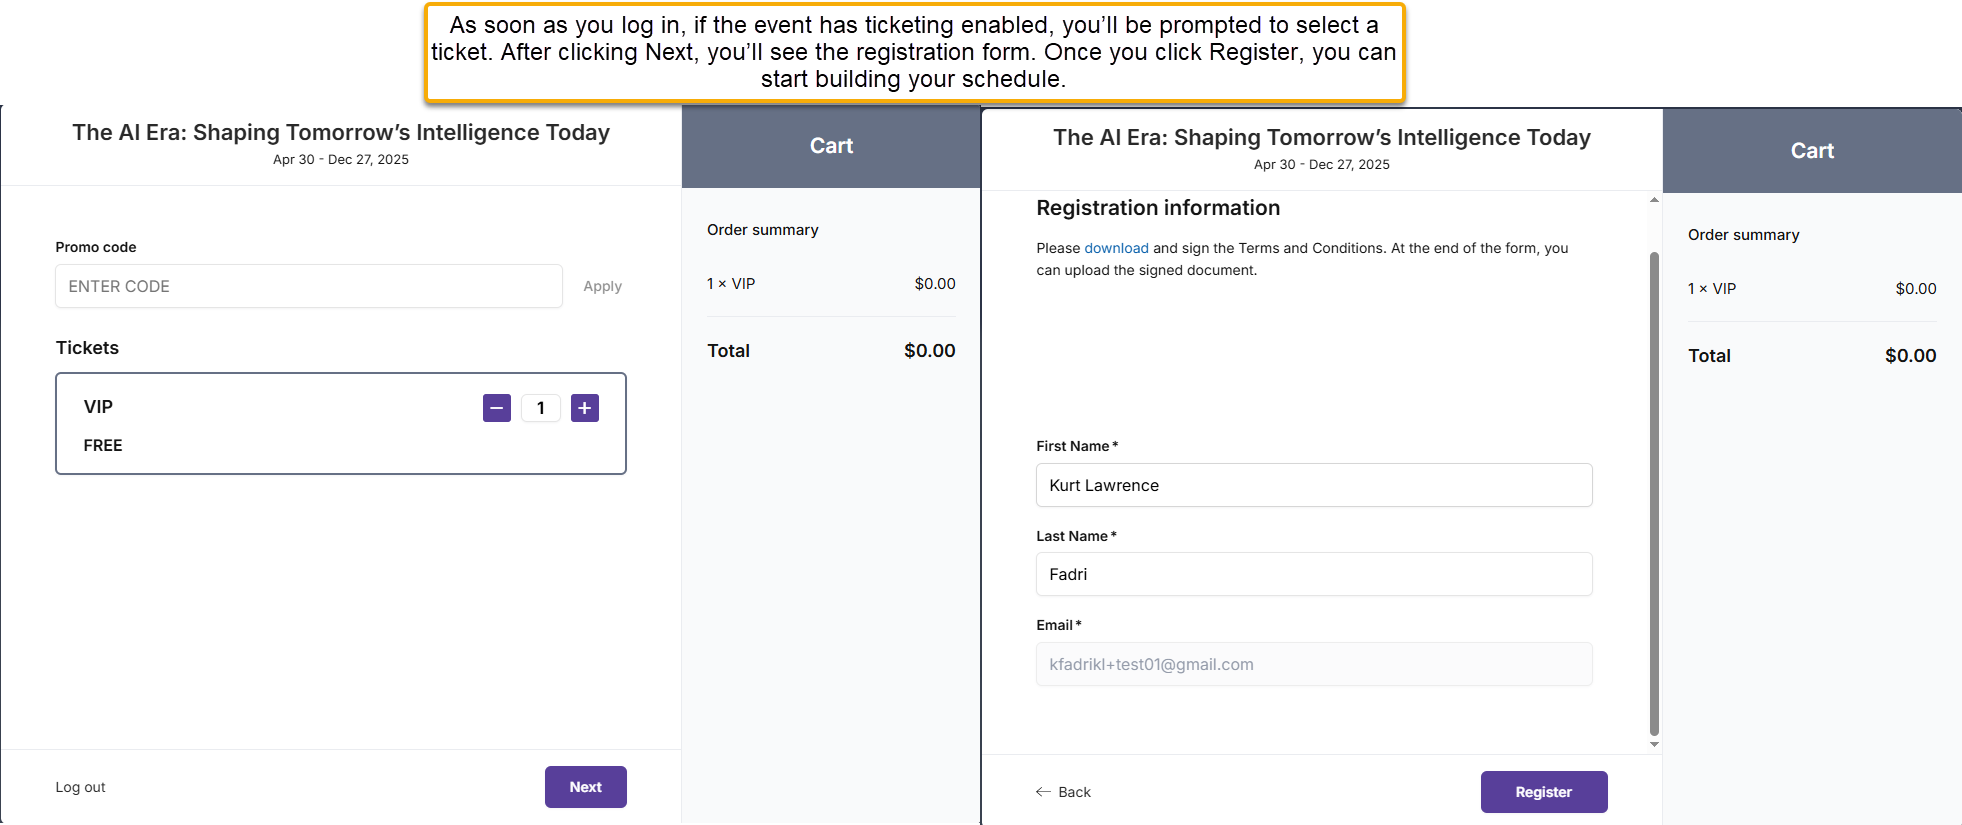
Once logged in, you’ll automatically see a prompt to select a ticket and fill out a registration form — if the event has ticketing enabled.
-
If there’s no registration pop-up, the event does not require ticketing, you can start building your schedule right away.
Prefer not to create an account? Some events allow Guest Checkout, which lets you purchase a ticket without signing up for Sched. See Guest Checkout Guide to learn how it works.
💡 Tip: If you visit an event page on Sched and only see the Log In button, this means the event is set to invite-only. You’ll need to contact the event planner to be added and receive a welcome invitation.
Register via Invite (Event planner Adds You)
Some events are invite-only, meaning you can’t join unless the Event planner adds you first.
There are two types of invite-only events on Sched:
-
Public Invite-Only Event You can view the event page, but you won’t see an option to join unless the event planner has invited you.
-
Private Invite-Only Event When you visit the event link, you’ll be asked to log in first, this means the event is completely private and only accessible to invited users.
In both cases, you’ll need to be added by the event planner to access the schedule.
How it Works:
- The Event planner adds you to the attendee list.
- You receive a Welcome Email from notifications@sched.com (subject: “You’re invited…” or “Build your schedule…”).
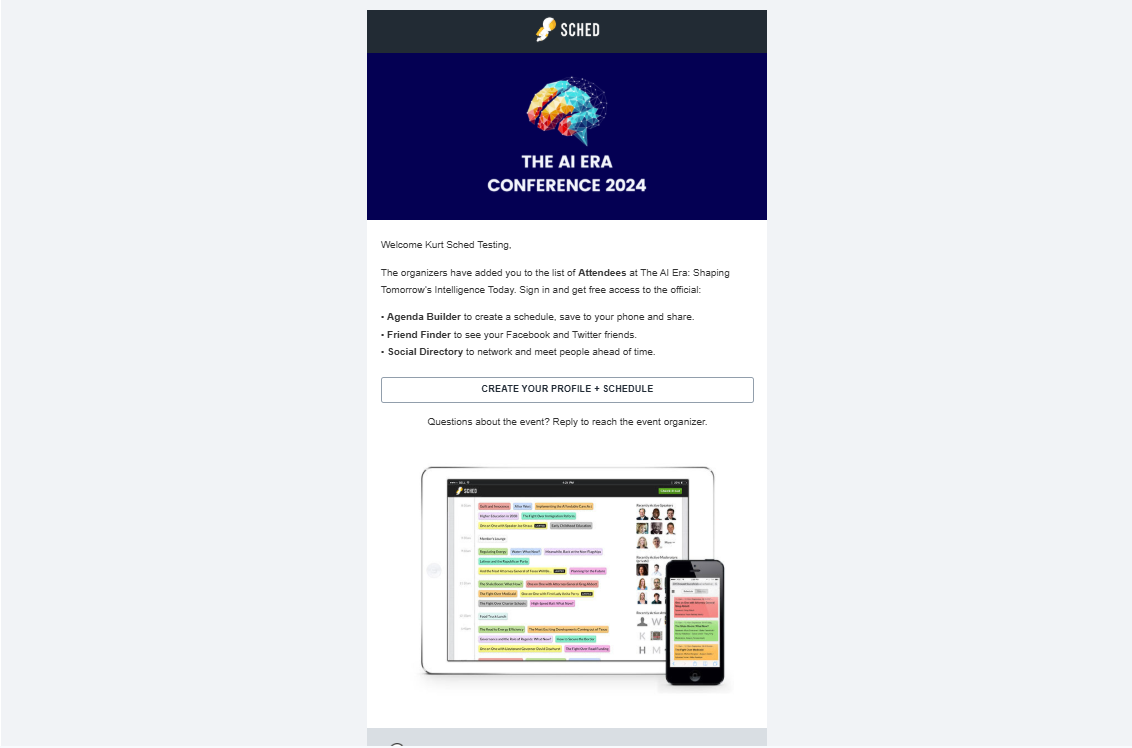
- Click the link in the email to:
- Set your password (if it’s your first time using Sched) If you’ve used Sched before and want to keep your current password, that’s totally fine. This step is simply offered in case you’ve forgotten your password or would like to update it for security, especially if you’re attending a new event.
- Once logged in, you’ll automatically see a prompt to select a ticket and fill out a registration form — if the event has ticketing enabled.
- Fill out a registration form or make payment, if enabled by the Event planner.

💡 Tip: If you do not see a registration form or ticket options, that means the event does not require them, and you can go ahead and begin building your schedule.
Quick video guide for Attendees:
Things to Keep in Mind
- You can search for an event or contact Sched Support if you need help locating one.
- Payments are processed through Stripe. If you didn’t receive a receipt, reach out to the Event planner directly.
- Refund requests must also be directed to the Event planner
How to Activate Your Sched Account (If You Registered via Eventbrite)
- Go to this link in your browser:
https://TheEventURLName.sched.com/eventbrite
Replace YourURLName with the actual event URL name.
For example:
https://techsummit2025.sched.com/eventbrite
or
https://myevent2025.sched.com/eventbrite - Enter your Eventbrite details:
- The email address you used to buy your ticket
- Your Eventbrite order number (found in your confirmation email)
- Click the “Activate My Account” button. Then set up your password.

Log in to Sched using Single Sign-On (SSO), but the available options depend on your device:
-
On the web and iOS: You can sign in with Google, Microsoft, Apple, or ClassLink.
-
On the web and Android: Google, Microsoft, and ClassLink SSO are supported.
- On the native app: Google, Microsoft, Apple, and ClassLink are supported.