Easily create and customize badges for your event. This guide covers how to access badge settings, personalize designs, update participant details, and export badges to ensure a smooth and professional experience for your attendees.
How to Access the Badge Section
- Navigate to your event control panel’s Registration tab and click Badges.
- If you’re using the Eventbrite integration, you’ll see a separate Badges tab in the control panel.
- Select a badge design that fits your preferred layout and style. You can also view any previously created designs under Saved Badges.
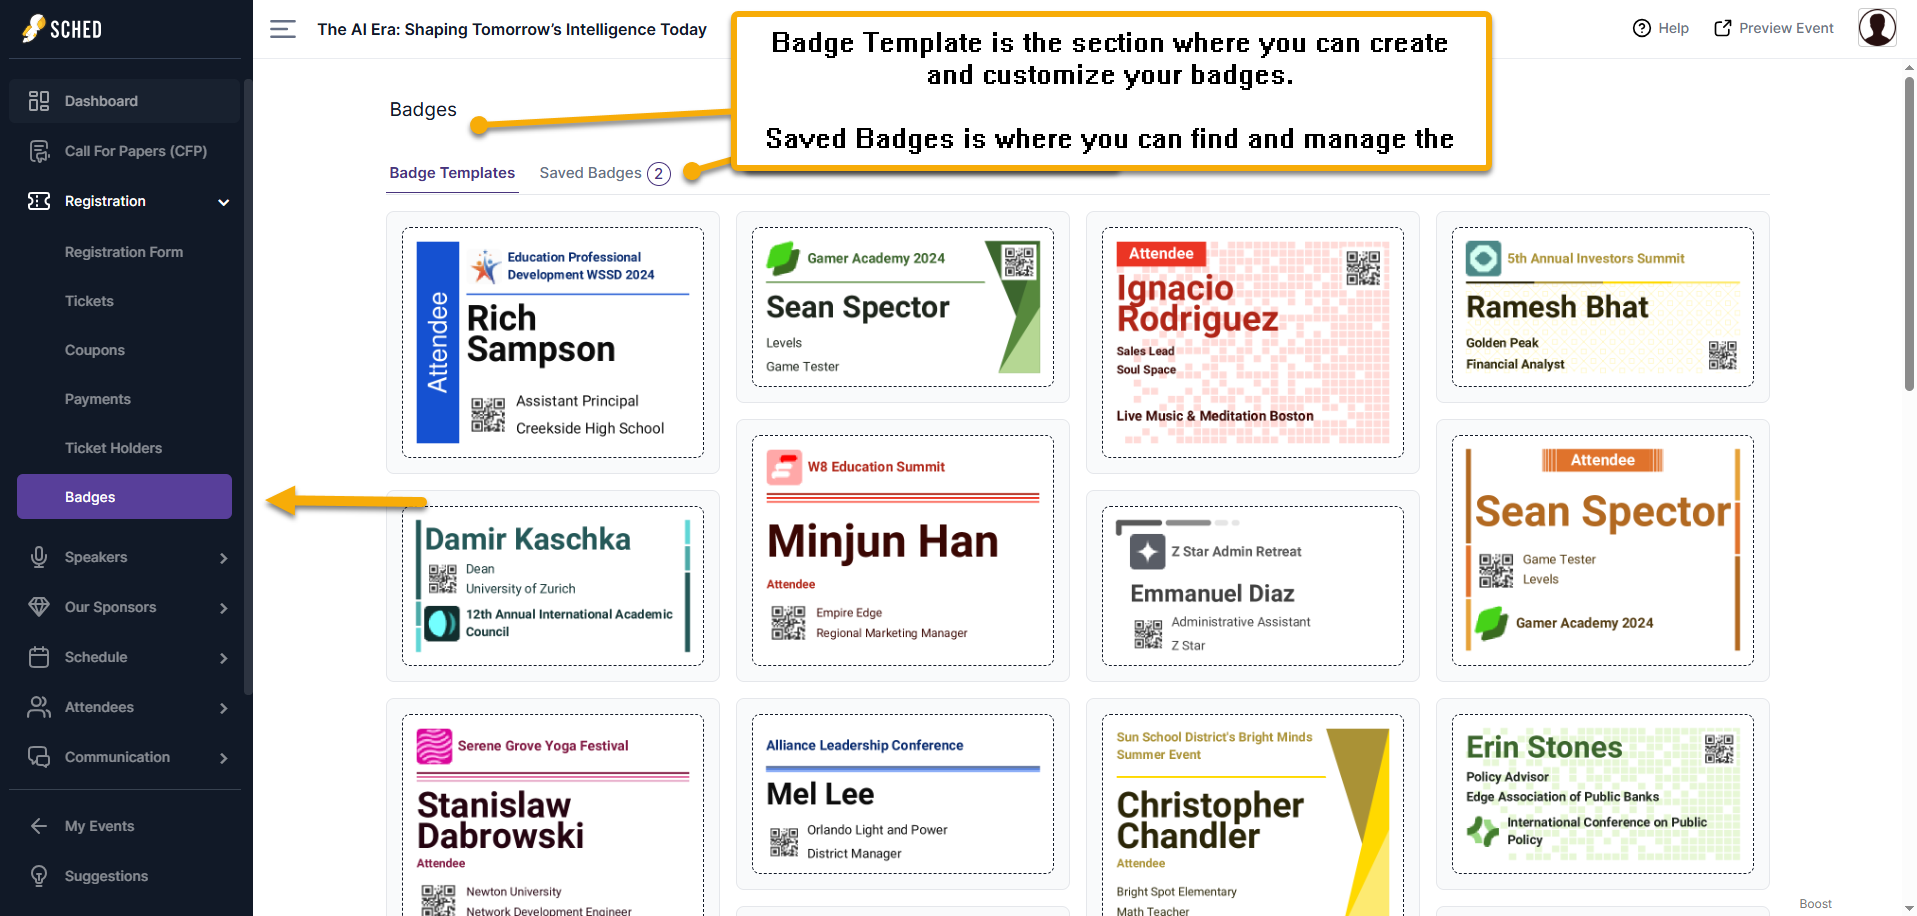
Customize your Badge Template
Badge Setup
- Badge size: You can select a badge size from the dropdown menu, including 2″ x 4″, 3″ x 4″, 4″ x 6″ (landscape), 6″ x 4″ (portrait), or choose Custom to set your own badge dimensions.
- Print Medium: You can select from the dropdown options: Label Sheets (Letter), Label Roll (e.g. Zebra ZD421/ZD621), Perforated Edges (Letter), Single Badge, and Customize the size for your badge paper type.
- Design Options: Choose from 7 layout designs to personalize graphics and layout.
- Base Color Theme: Match your event’s theme by customizing font colors.

Role and Tickets
- Role-Specific Badges: You can specify roles (e.g., Speaker, Artist, Exhibitor, Sponsor, and Ticket type) and rename them using the Display Role Option (e.g., change “Attendee” to “VIP”). You can then print badges for everyone with the selected role or ticket type, and the custom text will appear on each badge.

Text Field
- This is where you can customize the text colors for the Event Name, Name, Role, Position, and Company fields.

Images
- You can upload your event logo via the Mobile Icon section in Appearance settings directly in this field, enable rounded corners, and change or upload a background color or image.

QR code
- If you enable the QR code for attendees and turn on the instructions, it will display “Scan to Connect.

Shapes
- You can customize the color of the shapes in your badge template design. However, only the available shapes can have their colors changed. If an option is toggled off or unavailable, it means there are no other shapes to customize for that specific design.

Badge Back Image
- In addition to customizing your badges, you also have the option to upload a back image. If a back image is added, it will appear on separate page(s) when the badges are exported to a PDF.
- For best results, we recommend using an image with a minimum resolution of 150 DPI. Given the current badge dimensions and bleed settings, an image size of at least 600 pixels wide by 450 pixels tall is ideal.

Save the changes: If you forget to click Save Changes and proceed by clicking Next, a prompt will appear asking whether you’d like to save or discard the changes.
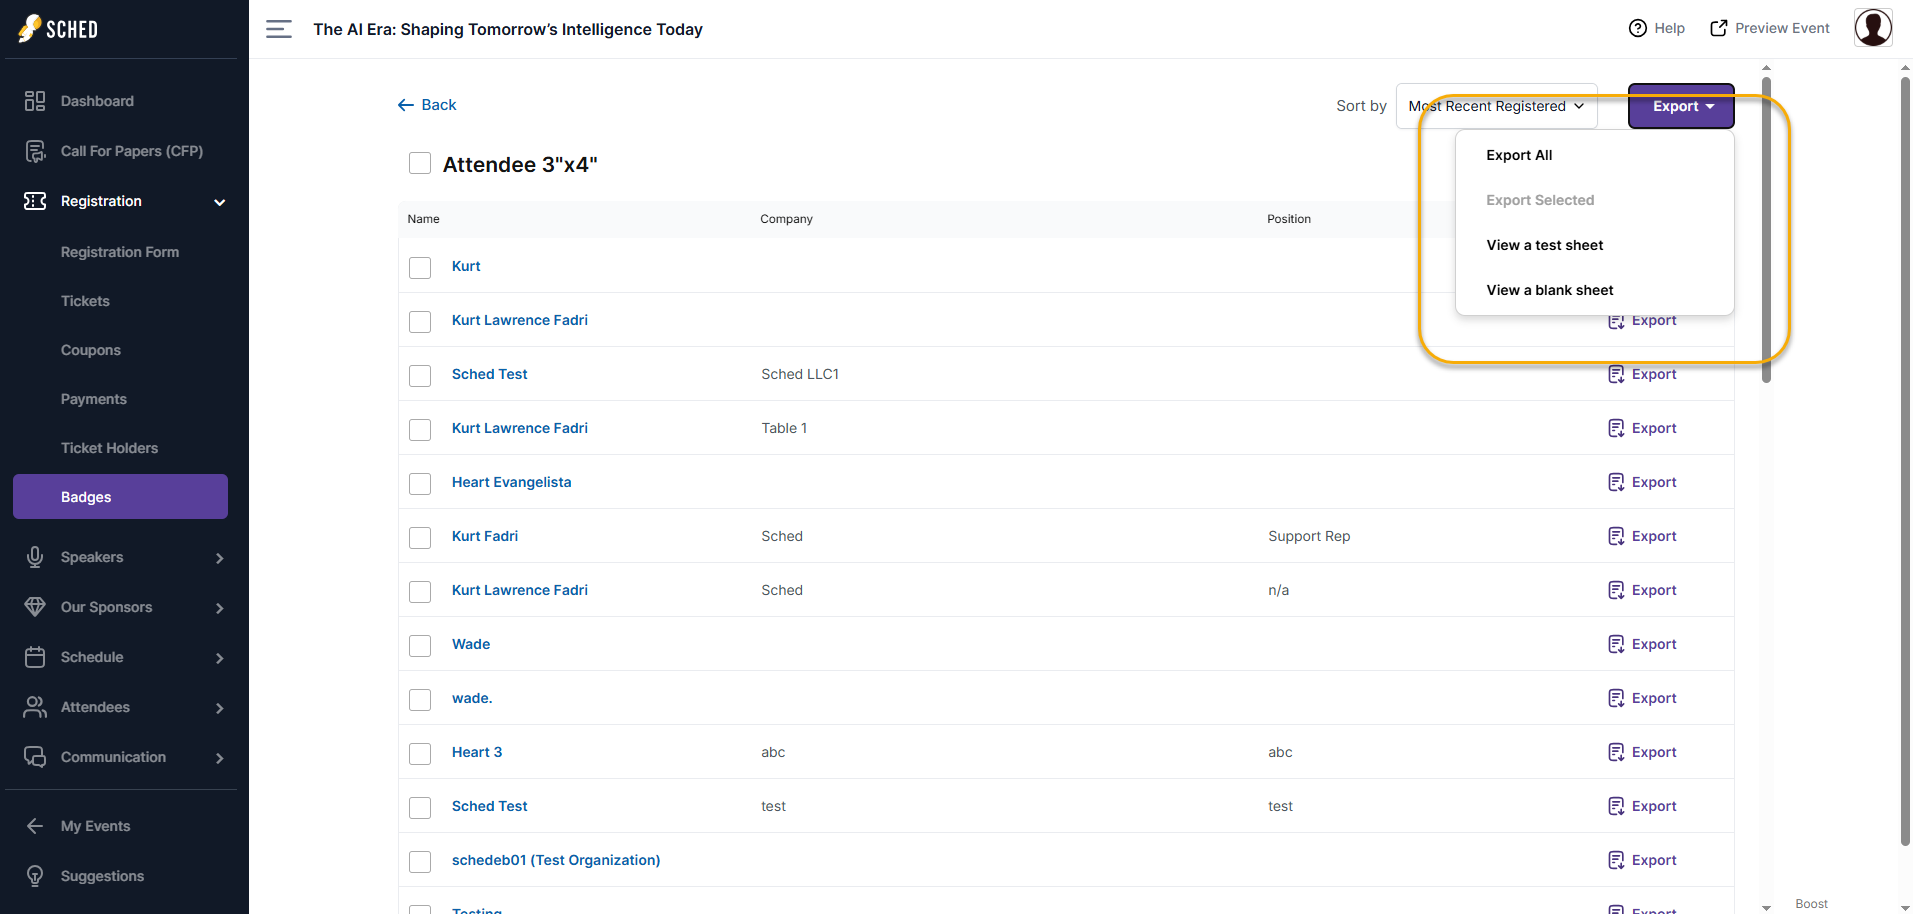
You can preview, export, and sort badges easily using the available options
-
Sort your attendee list using the Sort by dropdown: choose from Last Name, First Name, Most Recent Registered, Oldest Registered, Name Length, Company Name Length, or Position Name Length.
-
Export All to download all badge templates in one file.
-
Export Selected to choose specific attendees by checking the box next to their names.
-
View Test Sheet to preview your badge design with sample names.
-
View Blank Sheet to see the badge layout without any names added.
Guide in action:
Good to know:
-
When changes are made in the editor, you’ll be notified to save them before leaving the page.
-
If participants have long names, company names, or job titles/positions, the text will automatically shrink to fit within the designated fields.
How to Update a Participant’s Badge Name
To update a participant’s name on their badge, follow these steps. Please note that this only updates their badge for this event and won’t change their public profile.
-
After customizing your badge, select Next Step.
-
Click on the participant whose details you want to update.
-
You’ll be able to edit their name, company, and position.
-
Continue clicking Next to review and edit badge details for each participant included in your badge design.
Guide in action: